
When the tip is worn out or not being used for much time it is time to have it replaced or you can try to do it yourself. A player who is playing quite regularly will have his tip replaced every 2 to 3 months.
We guide you through the process of replacing a tip on a snooker cue.


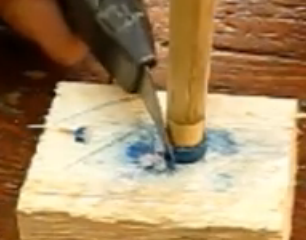

REPLACING THE TIP
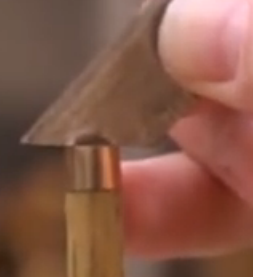
1. With a sharp (Stanley) knife, cut off the tip just above the ferrule. Do not damage the ferrule! You can also use a gripping tool with a very fine gripping end. But in that case the tip is being torn off the cue and not cut off the cue.
2. Complete the job with the knife by clearing all remaining tip material and glue. Make sure to end with a very flat surface.
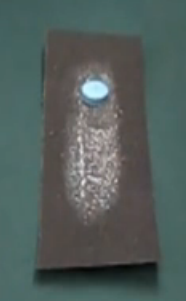
3. Prepare the tip by rubbing its bottom part over some sandpaper with a very fine texture. You can rub with one movement into the same direction and changing the way you hold the tip frequently. Some people also prefer rubbing into circles. Anyway … the surface of the tip needs to be perfectly flat.
4. Now you can burnish the tip with a lighter or a match. By doing so the bottom surface will get harder and impregnable to glue, and also you will get rid of all small loose threads on the bottom and side of the tip.
5. Add glue on to the cue, but don’t exaggerate with the quantity. A few drops will do.
6. Put the tip (slightly slanted) on the cue in a downward movement while slowly twisting the cue. Most people just press the tip with a single downward movement on the cue, leaving the chance of air bubbles to get stuck underneath. Increase the pressure slightly and adjust its position if necessary. You can finish the job by facing the cue upside down and pressing it on to a harder surface to increase the pressure. Hold this for a few seconds.
7. Remove all substances of glue to the side of the tip and the cue with a piece of cloth.
8. Usually a tip with a slight wider diameter is used to put on the cue to leave you some possibility to adjust, when not centered well enough. Once glued, you can simply place the shaft of the cue upside down and very carefully cut down aside the ferrule to even out both tip and cue diameter. Make sure you do not point too much to the inside with the knife when you cut down, otherwise you will end up with cone-shaped tip.
Some players prefer to play with a tip’s diameter to extend a bit further than the ferrule. Then it is called a ‘mushroom’ tip. It is all about choices and how you want the tip to be shaped.
9. A final touch is needed to shape the tip and prepare it for playing. You can shape the tip further with a file, pencil sharpener or sandpaper with very fine structure.
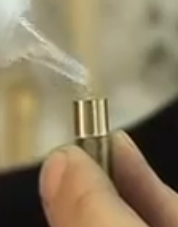
10. You can clean the ferrule from all substances of glue with a very narrow piece of sandpaper or abrasive wool.
11. Optionally you can burnish the side of the tip. By doing so the tip gets firmer and will last a little longer.
12. Job done!